1 | # if DEBUG |
贝塞尔曲线的基本用法
画五边形
1 | // 画五边形 |
画矩形
1 | // 画矩形 |
画圆和椭圆
1 | // 画圆和椭圆 |
画带指定圆角的矩形
1 | // 画带指定圆角的矩形 |
画圆弧
1 | // 画圆弧 |
画贝塞尔曲线
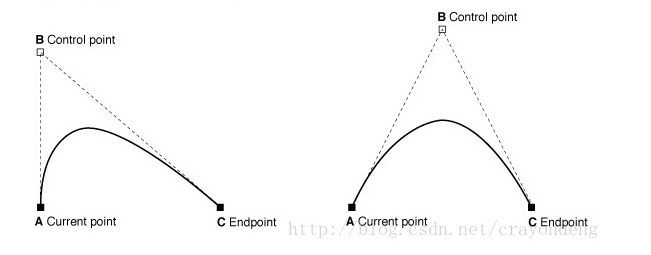
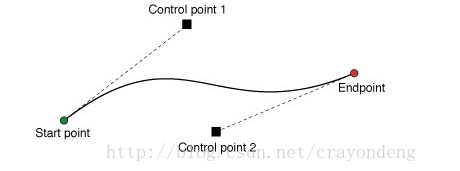
1 | // 画贝塞尔曲线 |
在Swift中同时用代理和Block(Closure)回调
目的:
A页面push到B页面,点击B页面的按钮传值到A页面,分别用delegate和Block来实现
1.在页面B定义delegate和Block
1 | importUIKit |
2.在push的时候
1 | moiveView.clickdidSelectItemAt{ (collection, indexPath)in |
用Alamofire发起网络请求 - swift4
1.创建一个NetWorkingTool单例
1 | import UIKit |
2.在ViewController发起调用
1 | import UIKit |